Get Started in 5 Minutes
EventBunker has easy to use intuitive apis and all covered in this documentation with examples.
Quick start will take your 5 minutes and after that you will be able to send events and receive your analytics query results as json or embedded chart.
1- Register
Go to eventbunker.io and register for free plan, it is great for the development period. You can upgrade your plan after going live with EventBunker.
2- Give your Account a name
Go to Accounts page and give your account a name. This will create a master api key for you that you can use to manage all your projects via Management API - Projects. You will have only one account in EventBunker.
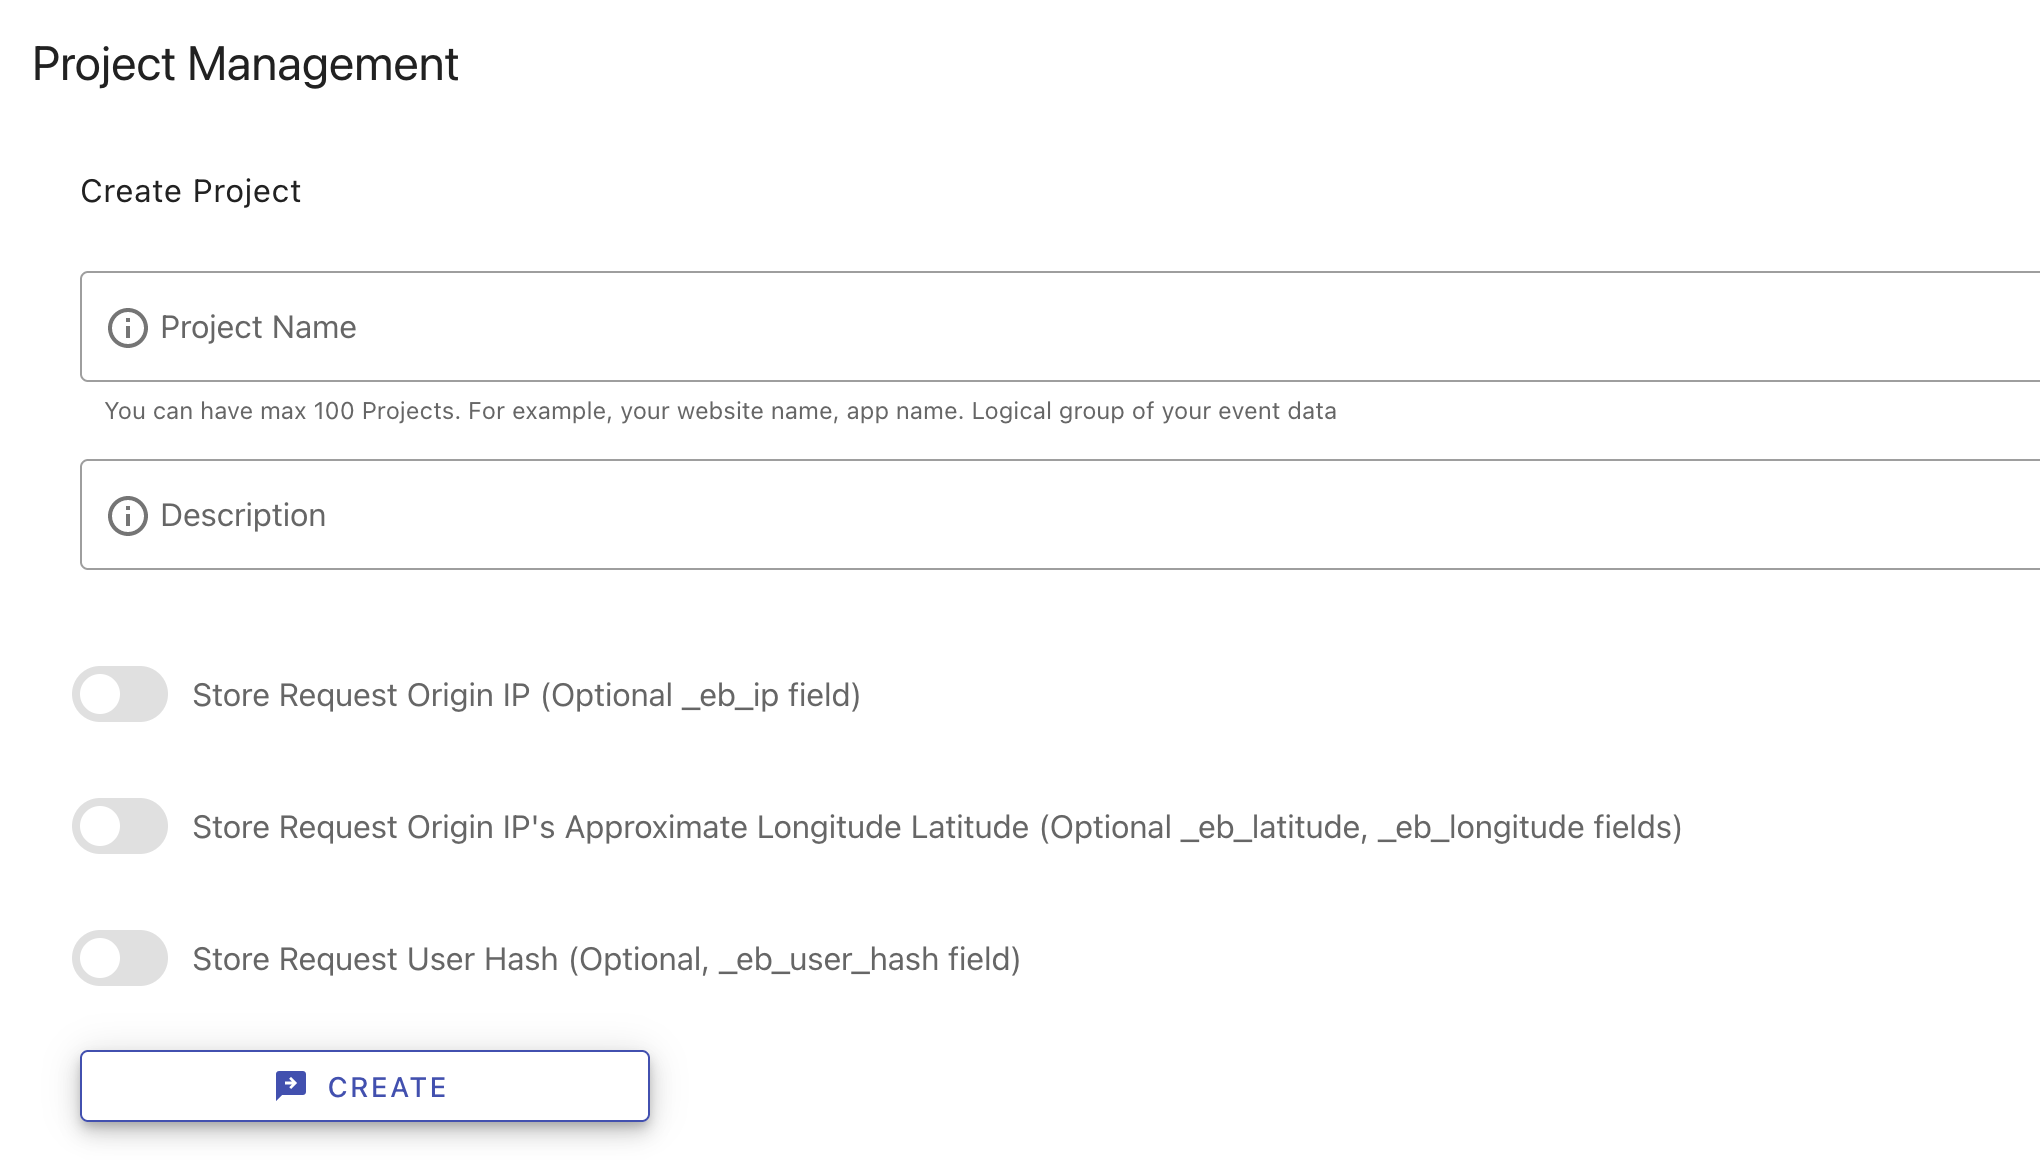
3- Create a Project
Go to Projects page and create your first project in your account. This will create a account master api key for you that you can use to manage all your api keys of this project via Management API - Api Keys.
4- Create Write and Query Api Keys
Go to Api Keys page and create your first query and write api keys in your account. This will create a write api key for you that you can use to send events via api. Also a query api key which you will use to query data back. You can also manage all your api keys via Management API - Api Keys.
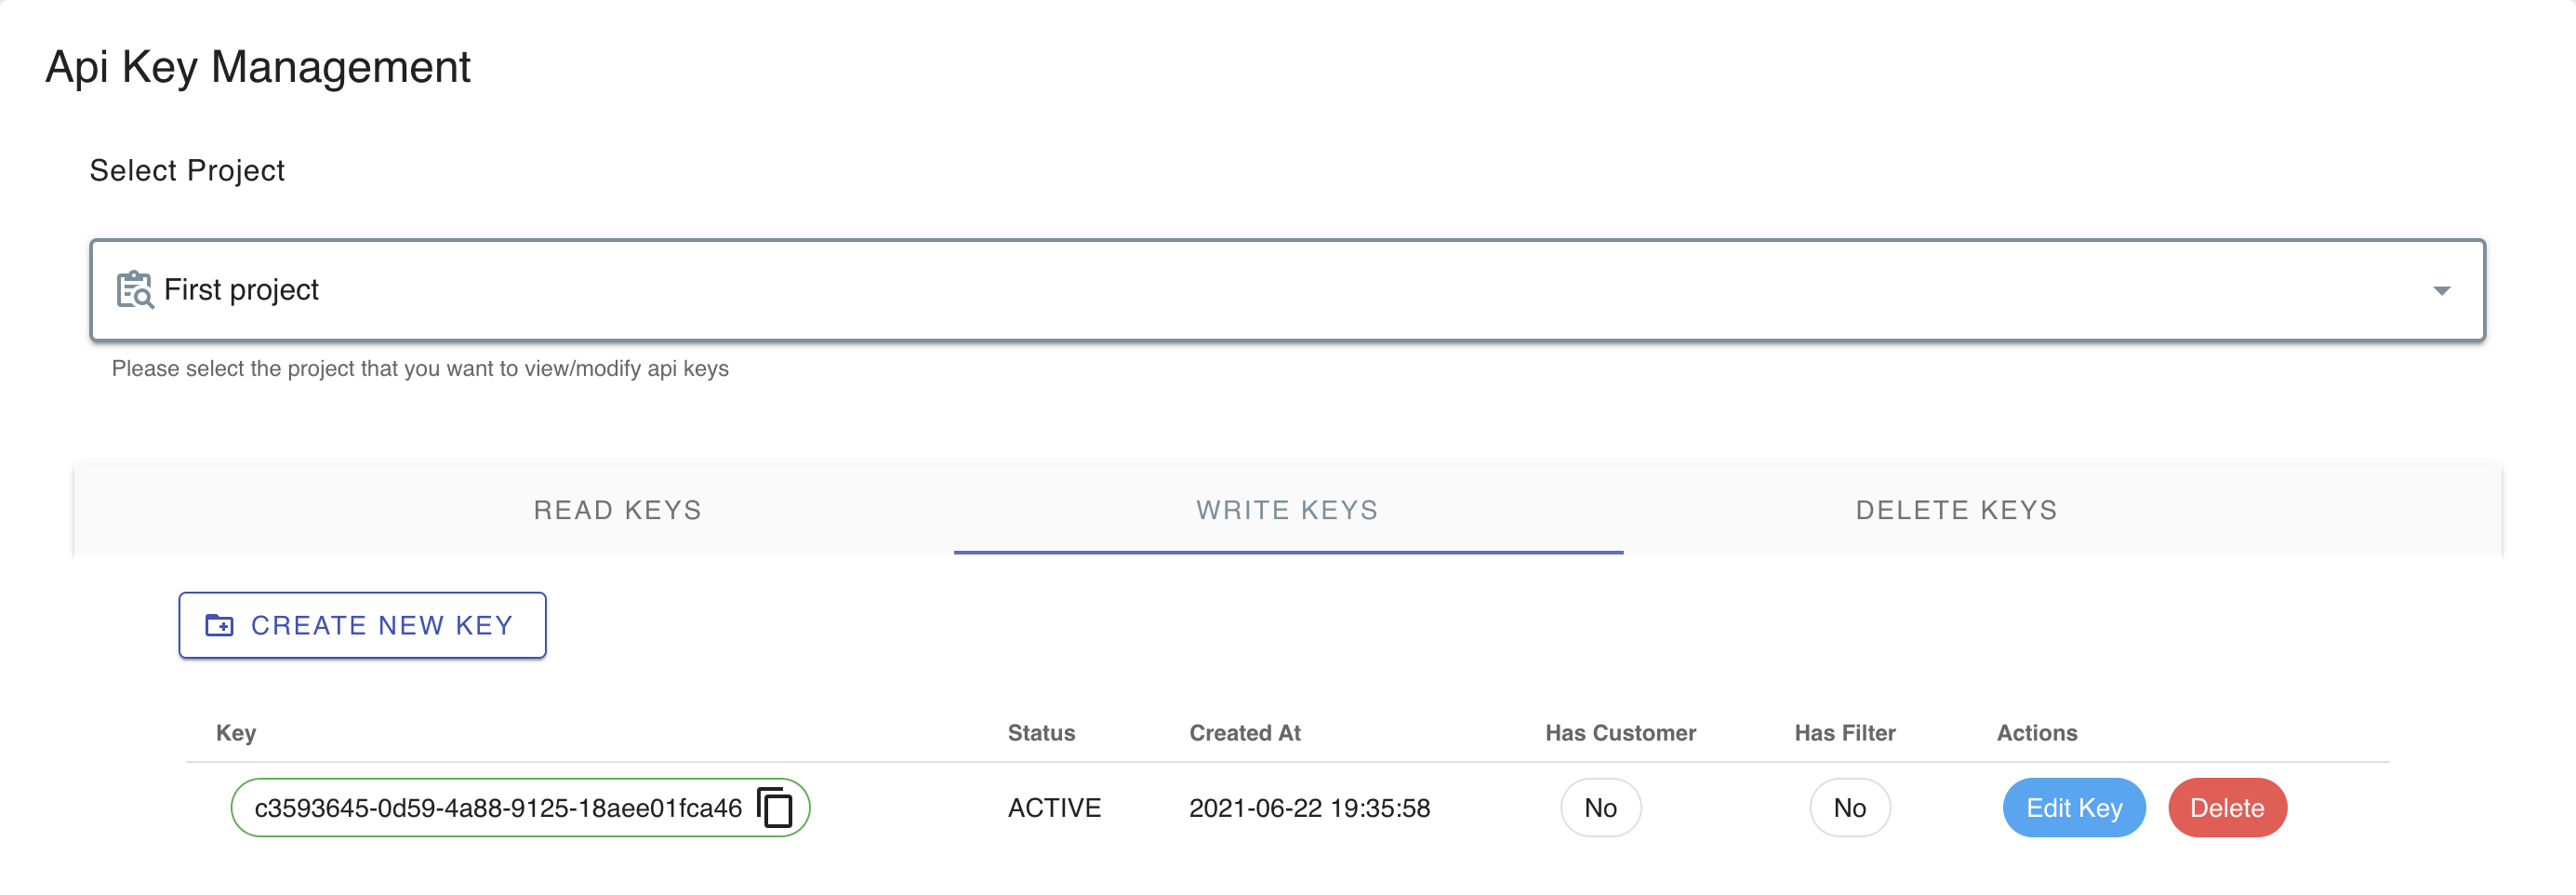
There are also optional features while creating api keys that enables different use-cases per api key. Such as automatically setting customer identifier on api key, also querying data back with dedicated customer identifier and event types.
Read detailed information in How to Use Api Keys after quick start.

5- Send Your First Event
Copy your write api key from web ui and replace with placeholder in example code below. Copy and run sample code below in your terminal window.
curl --request POST 'https://track.eventbunker.io/post' \
--header 'x-eventbunker-write-key: <YOUR-WRITE-API-KEY>' \
--header 'Content-Type: application/json' \
--data-raw '{
    "event_name": "my_first_event_name",
    "timestamp": "2021-06-26T14:48:00.000",
    "customer_identifier": "your_app_customer_id",
    "example_string_field": "abc.com",
    "example_number_field": 123,
    "example_array_field": ["cat", "dog"],
    "example_bool_field": true
  }'
That's it! Congratulations, you have sent the first event into your project. You can implement this request in any language since it is just a http post request to EventBunker api.
Api scales up automatically, so you do not need to use batch requests, you can send as many requests per second as you want.
You can learn more about tracking events here. Now let's query your events back!
6- Query Event Analytics Api
Copy your query api key from web ui and replace with placeholder in example code below. Copy and run sample code below in your terminal window. This is a very basic request, you can read about query elements here for many use-cases.
curl --request POST 'https://api.eventbunker.io/v1/query/json' \
--header 'x-eventbunker-query-key: <YOUR-QUERY-API-KEY>' \
--header 'Content-Type: application/json' \
--data-raw '{
    "timezone": "Europe/Amsterdam",
    "time_period": "minus_5_minutes",
    "group_by": ["event_name", "example_string_field"],
    "computations": [
      { "field_name": "example_number_field", "function": "sum" }
    ],
    "filters": [
      { "field_name": "event_name", "op": "equals", "value": "my_first_event_name" },
      { "field_name": "customer_identifier", "op": "equals", "value": "your_app_customer_id" }
    ]
  }'